Dell Printer Drivers
| Brand | Dell |
|---|---|
| Device Type | Printer |
| Support Link | Connect to support |
| Technology | Laser/Inkjet |
| Printer Output | Monochrome |
What is Dell Printer Driver?
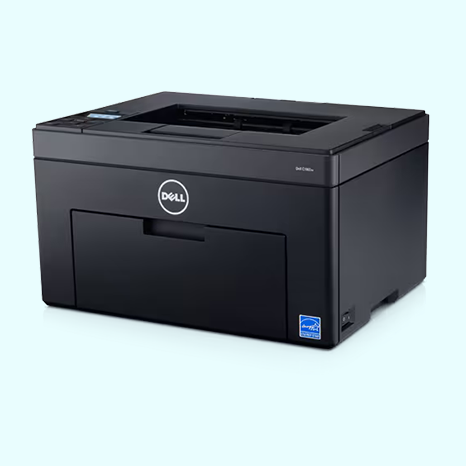
Dell printers are quite popular for their premium printing quality and amazing results. But, these printing devices require Dell printer drivers to complete any print task. Dell printer driver is a set of software programs that make printers and computers easier to understand each other. The machine comes with an inbuilt printer driver. However, in some cases, printers start to show printer driver issues due to some technical errors in the Dell printer and computer. In short, printer drivers work like a bridge between the Dell printer and the computer.
Why Do We Need Dell Printer Drivers?
If you own a Dell printer, then it is necessary to have Dell printer drivers installed on your PC and mobile devices. Many printers support different types of languages that are not easily comprehensible by your computer. To make the complex language understandable to computers and printers, the company offers a Dell printer driver.
How to Download, Uninstall & Update Dell Printer Driver on (Windows, Mac, Android, and iOS)?
Download and install
- First, open any web browser on our Windows and visit the Dell official support page.
- Next, type the Service Tag of your Dell printer to get the precise results of Dell printer drivers.
- After that, open the drop-down menu under Operation System and then choose the OS you are using on your Windows.
- Now, the driver's list will appear on the screen; look for the Drivers for OS Deployment or Application. (Try to locate the options with Driver or Drivers.)
- Also, note down one or more File Names listed there. They will be required once the downloading process is complete.
- Make sure to check that all the checkboxes on the left side of each file are selected, and then click on the Download All option.
- After that, depending on the browser, you will see the Save, Save File, or the downloading process will begin automatically.
- Once the download is complete, you will see the option to open the Downloads folder on your device.
- Now, right-click on the downloaded driver file and then choose the option Run as Administrator.
- When the User Account Control window displays, click on the Yes option to start the installation process.
- Lastly, follow the prompts you see on the screen to finish the installation process.
Update
- In the beginning, open a web browser on your device and go to the Dell Drivers & Downloads support page.
- And then, you are required to type the Service Tag on the printer to get the precise result of supportive drivers for your machine.
- After that, click on the Search option to continue with the further step.
- Under the Operating System menu, open its drop-down; from the drop-down list, choose the OS you are using on your Windows.
- Go to the Download list and select the file with the name firmware. (You can move to the next oldest operating system if you do not see firmware to download)
- Now, write the name of the file name as the firmware. You should know about it when the download is complete.
- Also, click on the Download option to begin the file download.
- The browser will tell you to open the file when the download is complete.
- Once the file download is complete, right-click on it and select the Properties option.
- In the next step, click on the Compatibility tab.
- After that, choose Change Settings for All Users.
- Click on the checkbox next to the Run this program in compatibility mode.
- Tap the drop-down menu of the operating system to select the OS you downloaded the file for.
- Afterward, choose the Apply option and then Next.
- In the following screen, click on OK.
- Right-click on the printer driver once again and click on Run as Administrator.
- Finally, the driver update will be complete on your device.
Download and install
- First, browse the Dell support face to download the suitable UFR II printer driver on your Mac.
- Select the operating system of your Mac and click on the Download option.
- When the download is complete, open the Disk image file to extract the package installer.
- In the next step, you need to launch the package installer file.
- After that, the install prompt will appear on the screen; click on the Continue option.
- Choose the Continue option and then agree with the license agreement by clicking on Agree option.
- Once again, click on the Continue option to install the printer driver in the selected folder.
- In the next step, click on the Install option.
- When you see the prompt to enter a password, then enter it.
- Then the install process will begin in the wizard.
- Once the installation process is done, click on the Finish option.
Update
- On your Mac computer, browse the Managed Software Center.
- After that, inspect if there are any updates remaining or not. If you see any printer drivers, then you are required to click on the Update All option.
- Now, wait for a while until the update download is complete.
- You can also restart your device to apply the update.
Download and install
- Tap on the Google Play Store app on your Android smartphone.
- In the search section, enter Dell Document Hub and wait for the result.
- A list of applications will appear on the screen; tap on the most appropriate one.
- Click on the Download option, and your device will download the app.
- When the app download is done, the app icon will be added to your home screen.
- You can launch the app and start working with your Dell printer.
Update
- Go to the Play Store on your device and head to the applications section.
- From there, tap on the Dell printer driver application.
- Now, if you see the Update option on the app, click on it.
- If the update option does not appear on the screen, then you are using the latest version of the app.
- In case you are facing any issues with the app, try uninstalling and reinstalling it.
Download and install
- Firstly, open the Apple App Store on your iPhone or iPad.
- In the search section, type Dell AirPrint and click on the search option.
- From the app list, tap on the application.
- On the next screen, click on the Get option.
- Let the application be downloaded and installed on your device.
- When the download is done, the Dell AirPrint icon will appear on your home screen.
- Open the app to connect the printer and print documents and copies.
Update
- To update the app, open the Apple App Store on your device and tap on the profile icon on the top right.
- After that, you will see all the applications that are required to be updated.
- Now, look for the Dell driver app you want to update.
- Once you find the app tab on the Update option. (If the update option is not available, it means the app is currently running on the latest version.)
- Once the update is complete, your app is ready to use.
Uninstall Dell Printer Drivers on Windows
- First of all, you need to turn on your Dell printer.
- After that, make sure that your printer device is connected to your computer wireless or wired or via Bluetooth.
- Now, you need to check the print queue to ensure there is nothing there.
- Next, start the Printer troubleshooter to solve the issue and automatically correct any printer spooler issues.
- Afterward, click on the Windows logo button and the R button at the same time. It will open the Run command dialog box on the screen.
- Now, type appwiz.cpl in the Run dialogue box and then tap on the Enter key.
- Moreover, click on the printer listings you want to remove from your device.
- Then, you are required to choose the Uninstall option.
- In the last step, you have to confirm the action of removing the printer device.
Uninstall Dell Printer Drivers on Mac
- Finally, go to the top side of the Mac screen and then click on the Apple logo option.
- For the next step, click on the System Preferences option.
- Now, head to the hardware section and click on Print & Scan; You will be able to see a list of printers with downloaded drivers on your device. (The list will be on the left side of the Print & Scan window.
- Next, click on the Dell printer you want to remove from your device.
- After that, select the (-) button located under the printer's list to remove the information from the list.
- Now, you can close the Print & Scan window.
- Go to the dock and click on the Finder option and choose the hard drive from the left side menu.
- Then, choose the options "Library," "Printers," "PPDs," "Contents," and "Resources."
- Afterward, various printer drivers list will show up on the screen.
- Next, select and drag the Dell printer driver to Trash in the dock.
- Lastly, press and hold the control button on the keyboard while selecting the Trash folder in the dock and choosing the Empty Trash icon.
Uninstall Dell Printer Drivers on Android
- On the home screen of your Android device, tap on the Dell application for a few seconds.
- When the app pops out, drag it to the Trash icon.
- A prompt will open on the screen to ask your permission to delete the app.
- Choose the Yes/Uninstall option to remove the app from your device.
Uninstall Dell Printer Drivers on iOS
- First, locate the Dell printer driver application on the home screen of your iOS device.
- After that, tap and hold on to the app until it starts to wiggle.
- Now, you need to tap on the (-) sign on the same app to uninstall the app.
- When the prompts show the option to Uninstall the app, click on the Uninstall option.
- Lastly, the app will be removed from your device.
Frequently Asked Questions
- First, visit the official Dell website.
- After that, go to the Support field.
- Then, type in your printer model name.
- Now, select the right operating system.
- Lastly, download the driver software from the given links.
- On your Windows 10, open any web browser and open the Dell printer support page.
- Afterward, move to the driver download page and enter Windows 10 in the operating system.
- Now, a list of drivers will appear on the screen; click any of the drivers you want to download on your device.
- Once the download is complete, follow the instructions on the prompt to finish the installation process.
- First of all, go to the Dell support page on your Mac.
- Head to the driver's page and specify the operating system you are using.
- A list of printer drivers will appear that are compatible with your system.
- Click on the Driver option that seems suitable for your system.
- Choose Download for the driver you want to download to your system.
- Weak and unstable internet connection.
- Not downloading the appropriate printer driver for the device
- The drivers not being compatible
- No free space on the device
- Due to some technical fault in your device
CLICK THIS FILE TO START.