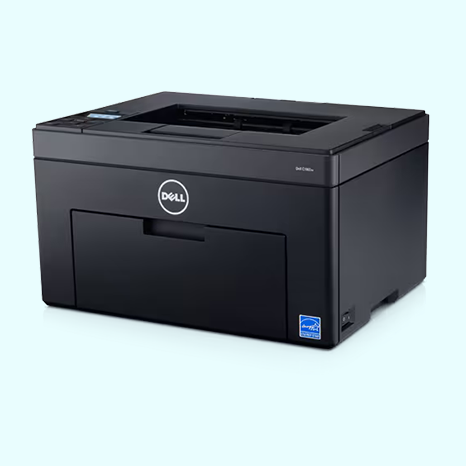
The Dell C1760nw color printer is a powerful machine that comes with cutting-edge printing technology. This is a wireless printer that gives a hand-free printing experience. Plus, this printer has got laser printing technology. The printer also offers fast printing speed for both color and monochrome printing. Dell C1760nw is the most suitable printer to use for both home and office use.
Features of the Dell C1760nw Color Printer
- The Dell C1760nw color printer comes with USB and Bluetooth connectivity technology for hassle-free connection.
- This printer offers an awesome speed of 15 ppm for monochrome and 12 ppm for color copies.
- The laser print technology offers fast, clean, and crisp pages.
- It is best to use for the heavy-duty cycle as it offers a large-duty cycle of up to 30,000 pages a month.
- This printer offers a resolution of 600 dpi for both color and black & white print.
- Dell C1760nw can be used for office and home use.
How to Download and Install Dell Printer Drivers Setup?
In order to use your Dell C1760nw printer, you need to download and install the compatible drivers. Without the drivers, the printer setup process will not be complete. Below is the step-by-step process to download, install, and set up the Dell C1760nw printer driver.
Download
- For the initial steps, you need to go to the official driver support page of Dell. (Printer Driver Support also offers a suitable driver for all models of Dell printers.)
- On the website, enter the name of your printer to search for the appropriate driver for your device. (Or, you can also open the View Products option to choose your product.)
- In the next step, choose the operating system you are using to use the Dell printer.
- After that, the compatible drivers will be shown on the screen.
- Click on the Download option next to the driver you want to download for your Dell printer.
- In the last step, wait for the download to be complete.
Install
- Once the download is complete, go to the downloaded setup file and double-click on it.
- And then, connect your Dell C1760nw printer to a computer. (Or, connect it to the same Wi-Fi network as your computer.)
- Then, you can install the drivers with the help of the Windows Add a Device method.
- After that, follow the installation screen instruction to complete the process.
Setup
- Go to your printer and then click on the Menu button.
- Use the buttons on the printer’s control panel until you see the Admin Menu option. And then click on the Set button.
- Then, try to find the Network option, then press the Set button once again.
- After that, go to Wireless Setup and touch the Set button.
- Next, choose the Manual Setup and press the Set button once again.
- You can enter your SSID into its specific field and select the Set button.
- Now, choose the system mode from ad-hoc or system as per your condition.
- To apply the settings on the wizard mode, you have to restart the Dell printer.
- Lastly, the printer setup procedure is complete and ready to use.
(Note: If you want to complete the setup of your Dell C1760nw color printer on a mobile device, then download the Dell Mobile Connect application)
Printer Offline Error Dell C1760nw Printer
Due to various minor or major issues in your Dell printer, you can get the issue of your printer showing offline. In this case, the printer will not turn on even though it is connected to a power socket. So, here are the methods to take out your printer from offline mode.
Method 1:
- Open the Control Panel on your computer and open the Device Manager settings option.
- After that, go to the USB (Universal Serial Bus) controller’s area and click on the arrow (>) to open the list of options.
- For each USB Root Hub, right-click on it and choose the Properties option. (You need to do this process only for the USB Root Hub)
- Also, you have to move to the Power Management tab.
- Now, look for the ‘Allow the computer to turn off this device to save power’ and deselect it.
- Lastly, you have to restart your computer to apply all the changes.
Method 2:
- For the first step, go to the Control Panel on your computer.
- In the control panel window, select the Devices and Printers option.
- Next, look for your printer option in the devices list and then right-click on it.
- When the list of options appears on the screen right, click on your printer option and then choose Properties. (If you are using Windows 10, then click on the Manage option.)
- After that, you have to go to the Ports tab.
- From the list, you will be able to see the IP address of your printer.
- Note down the IP address, and open any browser on a computer that is connected to the same network as your printer. (You only need to enter the numbers and ignore signs like underscore or something like that.)
- The settings menu of your printer will appear on the screen.
- Choose the Network or Connectivity option as per the device shown on the screen.
- Next, you need to change the Automatic option to Manual or Static.
- The manual IP address to be suggested option will also appear on the screen if you have not set it manually. (You need to write the IP address as it is but increase the last digit by 5.)
- After that, you have to enter the IP address in a web browser, and the list of settings will appear on the screen.
- After that, open the command prompt on your device and type ipconfig/all.
- Then, repeat step one once again to see the IP address of your device.
- Now, the printer offline problem will be completely fixed.
Dell C1760nw Printer - Printer Error and How to Resolve It (5 Errors)
The Dell C1760nw can show various problems from time to time. This problem can arise due to some technical glitch or incorrect configuration. No matter the issue, it is necessary to fix the issue to start using your printer. Here are some common issues of the Dell C1760nw Color Printer and their solution.
Errors
- The printer is not showing online
- Not printing issue
- Print job stuck in queue
- Printing faded copies
- The printer is not connecting to Wi-Fi
Solution 1. Reset your Dell printer
- Firstly, select the Menu option on your printer.
- Use the left and right arrow buttons to select System Setup and choose the OK option.
- Now, you need to go to the Clear Settings option and then click on the OK option.
- Then, choose the desired option by using the arrow buttons.
- After that, press the OK button once again.
- If you select the All Settings option, it restores all the settings to its initial stage.
Solution 2. Manually stop and start Printer Spooler on your computer
- First of all, you are required to click on the Start menu and choose the Run option. (You can simultaneously press the Windows and R keys to open the Run dialog box.)
- When the Run dialog box opens on the screen, you have to write ‘command’ and press the Enter key.
- In the command box, type ‘net stop spooler’ and press the Enter key. It will stop the print spooler service on your device.
- In the same prompt, ‘net start spooler,’ then it will start the printer spooler service.
Solution 3. Clear the printer queue of your printer
- On your keyboard, press the Windows logo button and R key at the same time. It will open the Run command box.
- In the Run box, type service.msc and then click on the OK option.
- When the service window opens, navigate to the Print Spooler option and stop it.
- After that, you are required to open the File Explorer on your device.
- Next, go to the path C:\Windows\System32\Spool\PRINTERS.
- Now, press the Ctrl + A buttons on the keyboard to select all the files in that folder.
- Right-click on the selected items and choose the option Delete. It will remove all the print jobs from that folder.
- Lastly, head to the Service window and start the Print Spooler service again.
Solution 4. Check the Driver port settings
- Firstly, click on the Start button on your computer.
- From the open index on the screen, select the Devices & Printers option from the menu. (You can also search for it in the search field.)
- Then, right-click on your Dell C1760nw printer icon.
- After that, click on the Properties option from the list.
- Also, you have to move to the Ports tab.
- In the next step, click on the Configure Port option.
- Now, inspect that the IP address shown in the report matches the Printer Name or IP Address field of your printer.
- If the details in the reports are not matching with the details of your printer, then make a change to make them the same and click on the OK option.
Solution 5. Update the driver of your Dell C1760nw printer
- Open any internet browser on your device and then browse the Dell driver download center.
- Then, you have to enter the product ID in the search section to get the driver options. (Or open the View Products option to choose your printer from the list.)
- Now, select the operating system you are using to operate the printer.
- Next, go to the Drivers for OS Deployment dialog and expand it.
- After that, you have to click on the Download option.
- When the download is complete open the downloaded .exe file and follow the prompts to install it.
- Once that's done, the new and latest driver will take place on your device.
Solution 6. Check the ink level on your printer
- Go to the ink cartridge on the back side of the printer.
- Check the ink level to make sure it is not running out of ink.
- When you see a low ink level, remove the cartridge from the machine.
- After that, refill the ink or attach the new cartridge to your printer.
- Try to print a copy of the document to see if the printer is working perfectly or not.
Note: If the printer problem is not gone yet, then it is best to take professional help or contact customer support service.
How to Connect a Dell C1760nw Printer to Wi-Fi/Bluetooth?
Wi-Fi
- First, you must go to the navigation panel and use the control button to choose the Network selection.
- After choosing a Network alternative, press the OK button.
- Now, select the option of WLAN Network and press the OK option.
- Next, go to the Setup on the wizard and then OK to move forward.
- When the “WLAN is Enabled” message prompts, choose the ON option.
- After that, your Dell printer will search for the available network connection.
- Look for your home or office connection in the results and select it.
- Moreover, you need to enter the security code of your network connection.
- Once the connection is established correctly between your printer and Wi-Fi, then the connected pop-up message will appear on the screen.
Bluetooth
You can connect the Dell C1760nw with your computer or mobile device. Here is the guideline for connecting the printer to Windows, Mac, iOS, and Android devices.
Windows/Mac
- First, plug in your Dell printer to a power outlet and press the power button to turn it ON. (Make sure to keep your printer and the device you want within a specific range.)
- Then, you have to click on the Start menu option in the computer system.
- From the appeared list of options, you need to select Settings.
- In the Settings window, you have to navigate the Bluetooth & Devices option.
- Next, click on the Printers & Scanners option.
- After that, go to the Add device to start searching for your Dell printer machine.
- Now, select the name of your machine from the search result.
- At last, the printer device will be paired to your computer via Bluetooth.
Android/iOS
- Before you begin, make sure your printer is turned on. (Also, ensure that you keep your printer within the 10-15 meter range of your smartphone)
- On the home screen of your Android/iOS device and look for the Settings function.
- Tap on Settings to open it, and then tap on the Bluetooth option.
- Then enable the toggle to Bluetooth to switch it on.
- Now, the smartphone will search for the available devices near it.
- When you see your Dell printer icon, tap on it.
- Finally, your Dell machine will be paired with your smartphone.